


这两天终于研究完了tycho,实现了用maven打包eclipse应用的基本方法。简单记录一下。
我这次用的是Tycho的POMLess方案,简单的说就是按照Tycho的要求组织目录结构,将插件等工程拷贝到指定的位置,然后使用一个扩展文件和一个顶层POM文件实现了编译打包等过程。
第一步:准备
就是准备一个目录(空目录),后面所有的操作都是在这个目录下进行的。另外假设你已经开发出了Eclipse的RCP或者Plugin应用,准备好这些应用的代码。
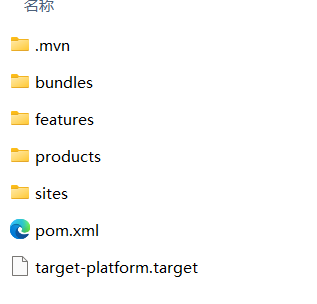
然后建立一些目录。这些目录是按照Tycho POMLess的要求来做的(参考:https://tycho.eclipseprojects.io/doc/latest/StructuredBuild.html), 应该和下面截图的目录结构一模一样。
第二步:编辑文件
编辑.mvn/extensions.xml文件:
<?xml version="1.0" encoding="UTF-8"?>
<extensions>
  <extension>
    <groupId>org.eclipse.tycho</groupId>
    <artifactId>tycho-build</artifactId>
    <version>${tycho-version}</version>
  </extension>
</extensions>
编辑.mvn/maven.config文件:
-Dtycho-version=4.0.8
编辑根目录里的pom.xml文件:
<?xml version="1.0" encoding="UTF-8"?>
<project
	xsi:schemaLocation="http://maven.apache.org/POM/4.0.0 http://maven.apache.org/xsd/maven-4.0.0.xsd"
	xmlns="http://maven.apache.org/POM/4.0.0"
	xmlns:xsi="http://www.w3.org/2001/XMLSchema-instance">
	<modelVersion>4.0.0</modelVersion>
	<groupId>zju.instr.ide</groupId>
	<artifactId>parent</artifactId>
	<version>1.0.0-SNAPSHOT</version>
	<packaging>pom</packaging>
	<properties>
		<maven.compiler.target>17</maven.compiler.target>
		<maven.compiler.source>17</maven.compiler.source>
		<project.build.sourceEncoding>UTF-8</project.build.sourceEncoding>
	</properties>

	<modules>
		<module>bundles</module>
		<module>products</module>
	</modules>

	<build>
		<plugins>
			<plugin>
				<groupId>org.eclipse.tycho</groupId>
				<artifactId>tycho-maven-plugin</artifactId>
				<version>${tycho-version}</version>
				<extensions>true</extensions>
			</plugin>
			<plugin>
				<groupId>org.eclipse.tycho</groupId>
				<artifactId>target-platform-configuration</artifactId>
				<version>${tycho-version}</version>
				<configuration>
					<executionEnvironment>JavaSE-17</executionEnvironment>
					<target>
						<file>../../target-platform.target</file>
					</target>
				</configuration>
			</plugin>
		</plugins>
	</build>
</project>
第三步:编辑Target Platform文件
关于Target Platform可以理解为一个编译和运行eclipse RCP和插件应用的环境,但是具体如何编辑这个文件还没有摸清楚,目前只能用从eclipse里自己导出来的target文件,而且只能用本机Eclipse自带的环境来编译和运行,后续可以研究如何从eclipse的UpdateSite里拉取需要的资源。
模板文件定义在根目录里的target-platform.target文件。这个文件名可以改,但是需要和上一步里的pom.xml里一致。
我使用的target文件内容如下:
<?xml version="1.0" encoding="UTF-8" standalone="no"?>
<?pde version="3.8"?>
<target name="Running Platform">
	<locations>
		<location path="/D:/GreenApp/eclipse" type="Profile" />
		<location includeAllPlatforms="false" includeConfigurePhase="false" includeMode="planner" includeSource="true" type="InstallableUnit">
            <unit id="org.eclipse.equinox.executable.feature.group" version="3.8.2400.v20240213-1244"/>
            <repository
                location="https://download.eclipse.org/releases/2024-03"/>
		</location>
	</locations>

	<environment>
		<arch>x86_64</arch>
		<os>win32</os>
		<ws>win32</ws>
		<nl>zh_CN</nl>
	</environment>
</target>
注意:里面的location标签的path属性需要改成自己本机上的eclipse主目录。
第四步:拷贝工程到该目录里
将插件工程拷贝到对应目录中:插件-->bundles,feature-->features, site-->sites, product-->products。
如果没有的需要在顶层的pom.xml里去掉(modules标签部分)。例如我没有用到feature和site就把features和sites去掉了。
第五步:运行
在根目录里打开终端,执行mvn clean verify.
执行完毕后在product目录里就能找到打包好的用于zip文件了。
PS:maven只负责编译打包等工作,具体的代码和各种配置文件仍需要在eclipse里进行编辑修改。打包出来的应用如果不能正确运行,可能是插件打包时候没有打包进各种所需要的资源和目录,需要仔细检查插件的各种文件(plugin.xml, build.properties, META-INF/MANIFEST.MF)。
Q.E.D.

Comments | 0 条评论